
LCD Spot Damage: Causes, Types, How to Test and Fix It
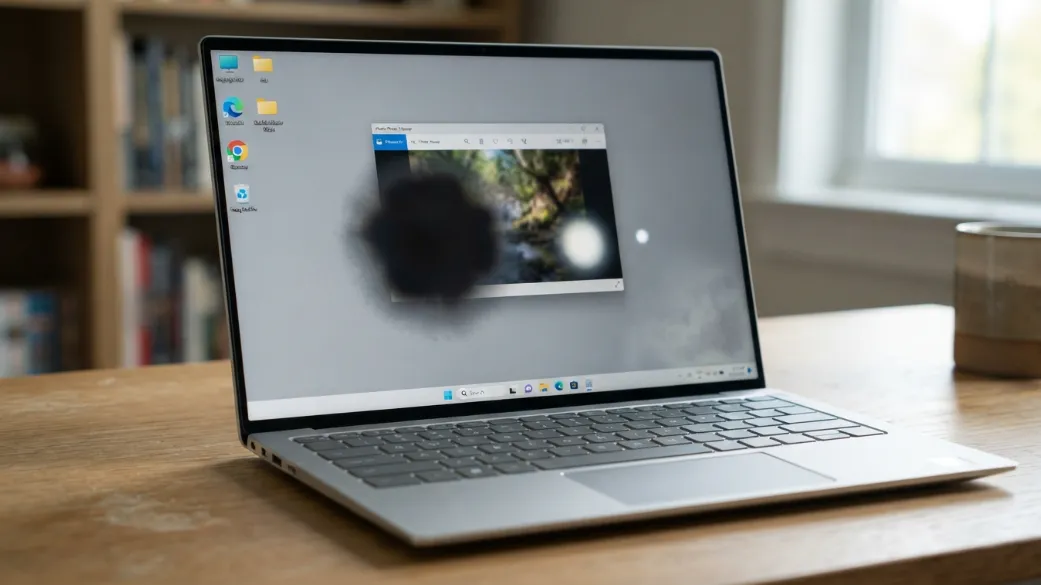
A spot on an LCD screen can be caused by anything from surface dirt to a damaged pixel or a damaged internal display layer. LCD spot damage may appear as a black spot, dark patch, bright area, cloudy mark, colored spot, or irregular pressure mark.
The important point is that not every spot means the LCD panel is damaged. A dead pixel, stuck pixel, backlight problem, surface mark, or display defect can look similar at first.
This guide explains how to identify the root cause, test the screen with different colors, distinguish LCD screen damage from pixel defects, and decide whether you need a screen replacement or professional repair.
Quick Answer: LCD spot damage is a visible dark, bright, cloudy, or discolored area caused by a problem within the display panel, backlight, or optical layers. Physical pressure, impact, heat, moisture, and internal component failure can cause these defects. A tiny fixed dot may instead be a dead or stuck pixel, so testing the screen with different colors can help identify the actual problem.
What Is LCD Spot Damage?
LCD spot damage is a visible area of abnormal brightness, color, or image reproduction caused by a problem within the display assembly. The affected area may remain in the same location even when you change the image displayed on the screen.
An LCD uses liquid crystal material between layers of the display to control how light passes through individual pixels. Behind the panel, the backlight provides illumination. Depending on the design, additional optical layers distribute that light evenly across the display.
When mechanical stress, impact, heat, moisture, manufacturing defects, or internal component failure affects these layers, the result can be a visible spot or patch.
The damage may involve individual pixels, the cell gap between display layers, the optical structure, the backlight, or other parts of the screen assembly.
A surface mark is different. Dust, fingerprints, scratches in the coating, or damage to the outer glass may look like a screen defect without affecting the internal LCD.
LCD spot damage can occur on:
- Laptops
- Computer monitors
- TVs
- Smartphones
- Tablets
- Industrial displays
- Automotive displays
- Self-service kiosks
- Vending machines
- Medical displays
- Outdoor digital signage
Some high-brightness displays and commercial LCDs also face additional risks from heat, vibration, thermal cycling, optical bonding, and long operating periods.
What Does LCD Spot Damage Look Like?
There are several types of display damage, and their appearance can provide useful clues about the underlying problem.
Vertical or Horizontal Lines
Solid lines running top-to-bottom or side-to-side (often green, pink, black, or white) indicate fractured transistor columns or severed ribbon connections beneath the glass, which remain fixed across reboots and screenshots
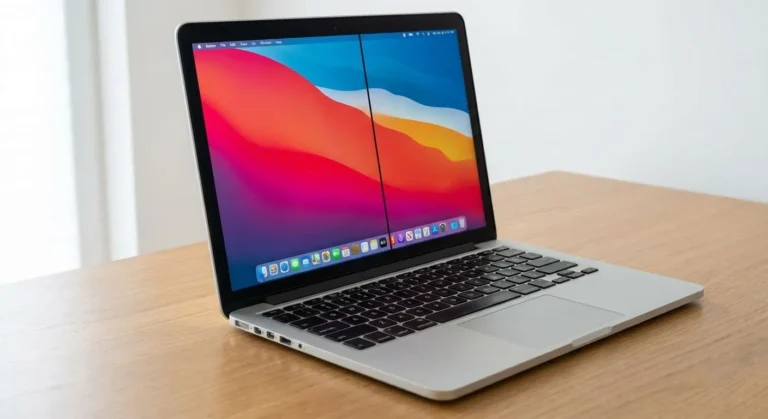
LCD damage can sometimes appear together with vertical or horizontal lines. If your screen has a persistent line as well as a dark or bright spot, see our guide on black line on the laptop screen for additional display tests.
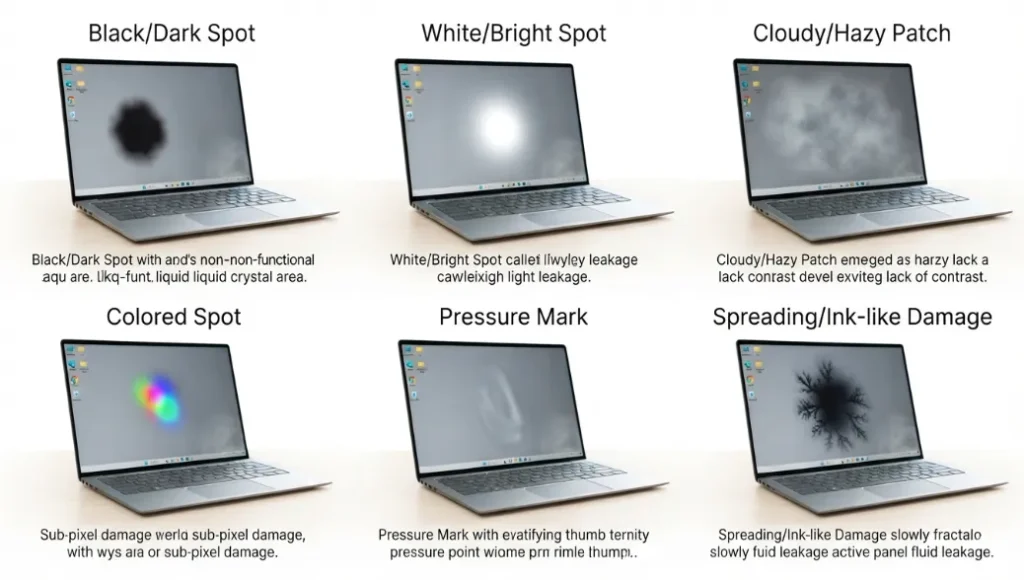
Black or Dark Spots
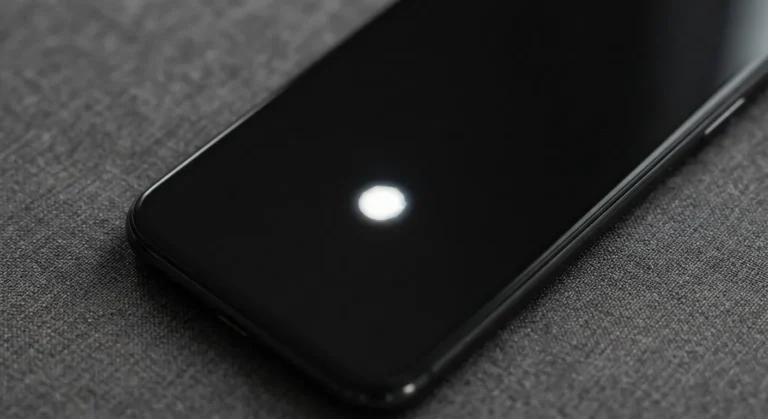
A black spot on an LCD screen may appear as a small fixed dot or a larger dark patch. A tiny, perfectly defined dot is more likely to be a dead pixel or dark subpixel. A larger irregular area can indicate LCD panel damage, pressure damage, or an internal problem affecting the light path. A dark spot on an LCD screen that remains visible across different images deserves further testing.
White or Bright Spots
A white spot on an LCD screen may appear as a small bright dot or a larger illuminated patch. A tiny bright dot can be a stuck or defective subpixel. A larger bright area may be related to the backlight, diffuser, compression, or damage to the optical layers. Bright spots are often easier to notice on dark backgrounds.
Cloudy or Hazy Patches
A cloudy area does not always have a sharp boundary. It may look like uneven brightness, a gray patch, or a hazy section of the display. This can be related to panel uniformity, pressure, optical layers, manufacturing variation, or mura. Some displays naturally have minor uniformity differences, so the severity and visibility matter when determining whether there is a genuine defect.
Colored Spots
A red, green, blue, yellow, or other colored spot may indicate a pixel or subpixel problem. If the mark is extremely small and remains one color, check it against solid red, green, blue, white, and black backgrounds. This can help determine whether individual pixels or subpixels are involved.
Pressure Marks
Pressure spots on a laptop screen are often irregular rather than perfectly circular. Excessive force on the display, such as closing a laptop with an object left on the keyboard, causes LCD screen pressure marks. These marks appear as bright, dark, cloudy, or discolored patches depending on how the pressure damages the internal layer
Spreading or Ink-Like Spots
An ink-like area that grows over time is more concerning than a small stable pixel defect. This appearance can occur after physical impact, liquid exposure, severe internal panel damage, or other failures within the display assembly. If a spot becomes larger or develops nearby discoloration, lines, or additional dark patches, stop applying pressure to the area and consider professional inspection.
How to Tell Which Type of Screen Problem You Have?
The appearance, size, and behavior of a spot can help you narrow down the cause. Use the clues below before assuming that the LCD panel needs to be replaced.
| What You See | Most Likely Cause | What to Check |
| Tiny black or permanently dark dot | Dead pixel | Display a white screen and inspect the dot closely |
| Tiny red, green, blue, or bright dot | Stuck pixel or subpixel | Test the screen with red, green, blue, white, and black backgrounds |
| Large irregular dark patch | Pressure or LCD panel damage | Check the area on white, black, and RGB screens |
| Bright or glowing spot | Backlight or optical-layer problem | Test with a black screen and different brightness levels |
| Bright area near an edge or corner | Backlight bleed | Display a black screen in a dark room |
| Cloudy or hazy area | Mura, pressure, or optical-layer issue | Check white, gray, and other uniform colors |
| Colored area larger than a single pixel | Panel or optical problem | Test multiple solid colors and check whether the shape changes |
| Mark disappears after cleaning | Dirt, residue, or surface contamination | Clean the screen gently with a suitable microfiber cloth |
| Defect appears only inside Windows or one application | Software or graphics issue | Take a screenshot and check the BIOS or boot screen |
| Defect appears on the physical screen but not in a screenshot | Physical display problem | Compare the built-in display with a screenshot on another device |
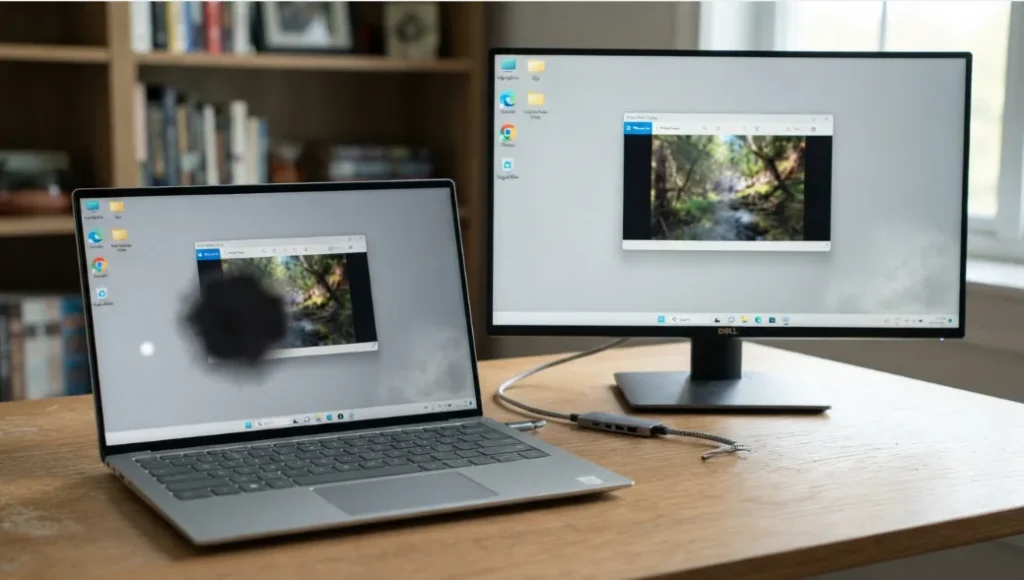
| Same defect appears on an external monitor | Graphics, software, cable, or computer-related problem | Test another cable, display, connection, or graphics path |
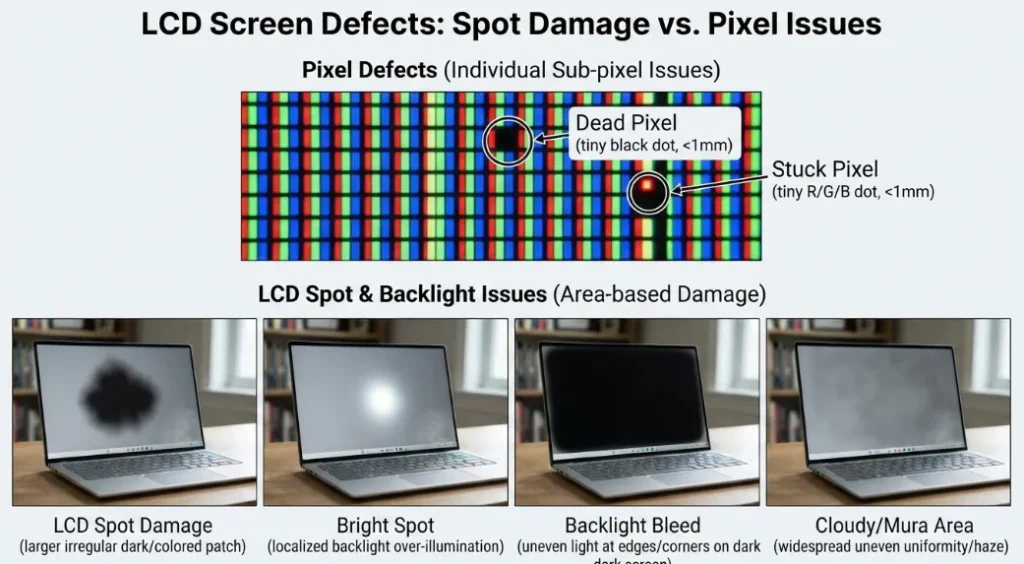
Size Is an Important Clue
A single tiny dot is more likely to be a pixel or subpixel defect. A larger irregular area is more likely to involve the LCD panel, pressure, backlight, diffuser, or another internal display layer. However, size alone cannot confirm the cause. Use multiple tests before deciding that the screen needs replacement.
Check Whether the Defect Changes With Color
Solid-color tests are useful because different display problems become more visible against different backgrounds:
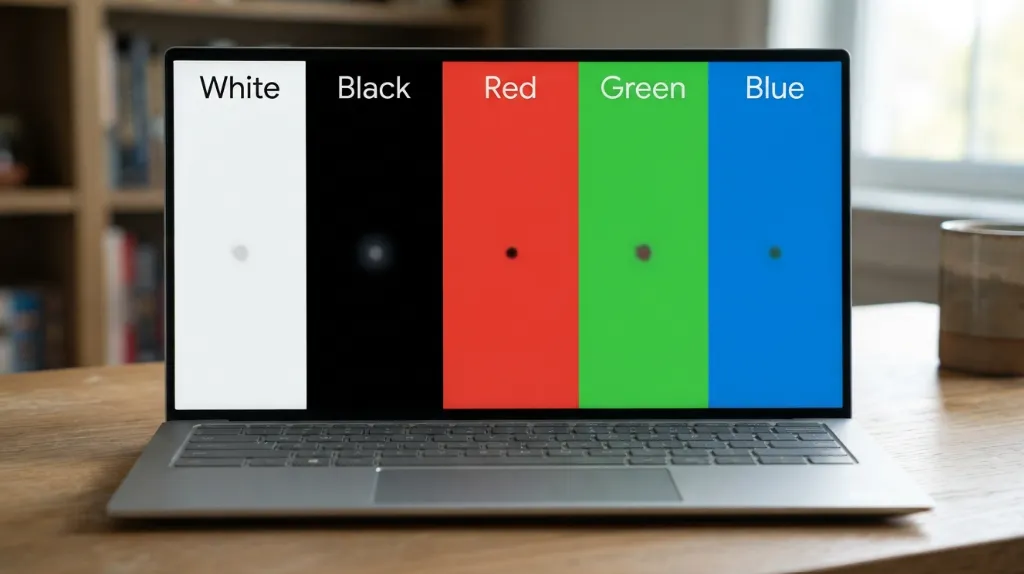
- White: Useful for finding dark pixels, dark spots, and uneven areas.
- Black: Useful for finding bright spots and backlight bleeds.
- Red, green, and blue: Useful for identifying stuck pixels and subpixel defects.
- Gray or other uniform colors: Useful for spotting cloudy areas and displaying uniformity problems.
If a tiny dot remains one color across different test screens, a stuck pixel or subpixel is more likely. If a larger area changes in appearance as the background color changes, the problem may involve the panel or its optical layers.
The Screenshot Rule: Software vs. Hardware
To know for sure whether your screen is physically broken or just showing a digital glitch, apply this quick test:
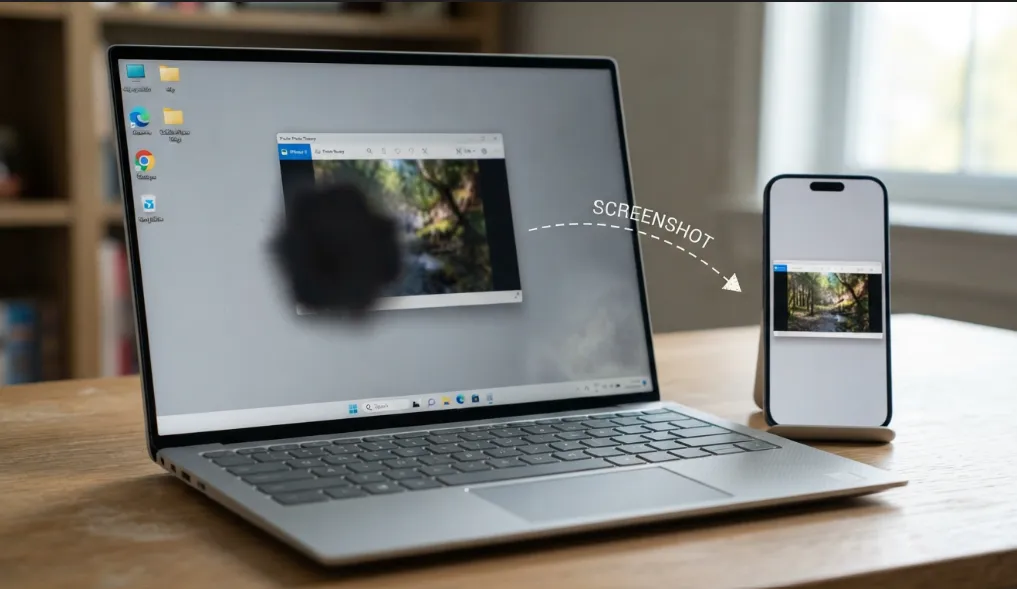
- Visible in the screenshot: The image data contains the defect, so investigate the application, operating system, graphics driver, GPU, or other parts of the graphics path.
- Not visible in the screenshot: The defect is likely occurring in the physical display path, such as the panel, backlight, or display connection.
Clean the Screen Before Diagnosing Internal Damage
A fingerprint, dust particle, residue, or damaged surface coating can look like an LCD defect. Clean the display gently with an appropriate microfiber cloth before performing further tests. (Refer to the Golden Rule below regarding pressure).
The Most Important Rule
Do not diagnose an LCD spot based on appearance alone. Use the spot’s size, shape, color, behavior across test colors, screenshot result, and boot-screen behavior together. If the evidence points to physical panel damage, software is unlikely to repair it and screen replacement may be the practical solution.
What Causes LCD Spot Damage?
LCD spot damage causes vary depending on the device and how the display is constructed.
Pressure on the Screen
External pressure compresses the microscopic cell gap between the glass layers, permanently misaligning liquid crystal molecules and scattering light into a cloudy or bruised patch.
Excessive pressure is one of the most common causes of LCD pressure damage. A display can be damaged by:
- Pressing the screen with a finger or object
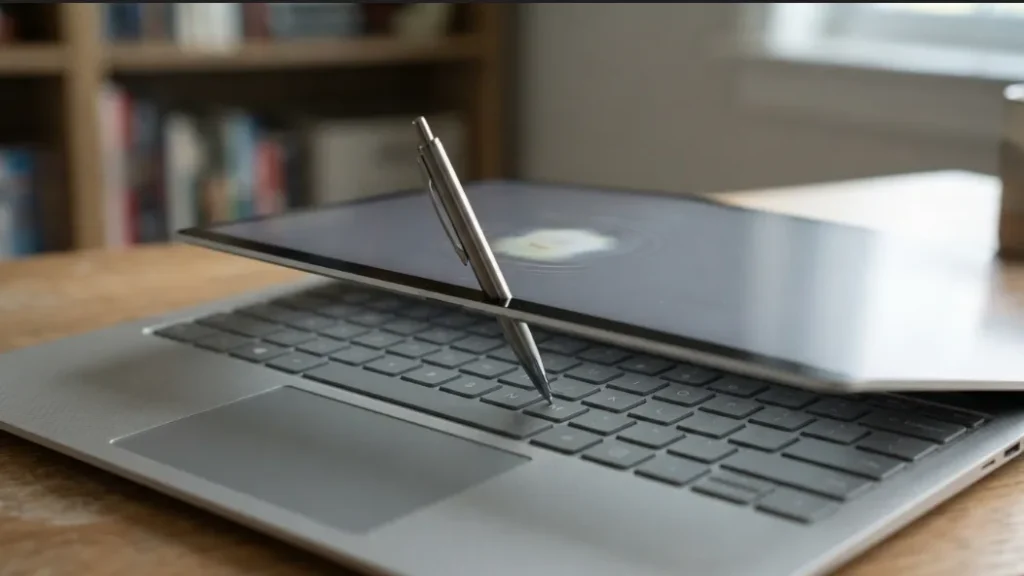
- Closing a laptop on a pen or other object
- Placing a heavy item on a laptop
- Compressing a device inside a tightly packed bag
- Applying excessive force while cleaning
- Bending or twisting a thin display assembly
LCD pressure spot damage can occur even when the outer glass does not crack. The internal display layers can experience compression or mechanical stress without producing obvious external damage.
Drops and Physical Impact
A drop or impact can damage the internal display panel even when the outer glass looks intact. The display may develop a dark patch, bright area, colored mark, black lines, or other defect immediately after the impact, or become noticeable later. Impact can also create a crack inside the display structure that is not immediately obvious from the front.
Laptop Keyboard or Object Pressure
Trapping an object between the keyboard and screen puts laptop displays at risk. Closing the lid over a pen, USB drive, or debris creates damaging localized pressure. Repeated compression can eventually cause pressure marks on a monitor or laptop screen. Before closing a laptop, make sure nothing is sitting on the keyboard deck.
Heat Damage
Excessive heat can affect electronic components and optical materials inside a display. Long-term exposure to high temperatures, focused sunlight, poor ventilation, or heat generated by nearby electronics can increase the risk of display problems. Displays designed for high-brightness or outdoor environments require appropriate thermal management because continuous heat and thermal cycling place additional stress on components.
Liquid or Moisture Damage
Liquid entering a display assembly can cause discoloration, corrosion, image problems, or spreading damage. Moisture can also affect the electronics controlling the panel. If a device has suffered liquid exposure, avoid repeatedly powering it on just to check the screen. The appropriate response depends on the device and extent of exposure.
Backlight or Diffuser Damage
The backlight system illuminates the LCD. Light passes through optical layers designed to distribute illumination across the display. Damage to the diffuser or another optical component can create bright patches, dark areas, or uneven illumination. Some LCD displays use LED components rather than older lamp-based backlights.
Internal LCD Panel Failure
An internal LCD failure can affect pixels, subpixels, transistor circuits, or other components inside the panel. The result may be a fixed spot, discoloration, black lines, vertical or horizontal lines, or an area that no longer displays correctly. This is internal display damage rather than a Windows or application problem.
Manufacturing Defects
Not every display defect is caused by the owner. LCDs can leave manufacturing with pixel defects, uniformity variations, or other display defects. Manufacturers and brands have different policies for what qualifies for warranty replacement. For example, Samsung and other manufacturers use their own pixel-defect and warranty criteria. Always check the policy for your exact model instead of assuming that one dead pixel automatically qualifies for replacement.
Aging and Wear
LCD panels have a finite lifespan. Long-term use can contribute to changes in brightness, uniformity, backlight performance, and other components. Age alone does not mean an LCD will develop a spot, but an older display may be more likely to experience component degradation.
Delamination and Layer Separation
Delamination occurs when layers within a display assembly separate or lose their intended bond. Depending on the display construction, this can create cloudy areas, bright patches, discoloration, or other irregular optical effects. Optical bonding is especially important in commercial, automotive, kiosk, and outdoor display applications because the layers must remain properly aligned and bonded during vibration and temperature changes.
How to Test for LCD Spot Damage?
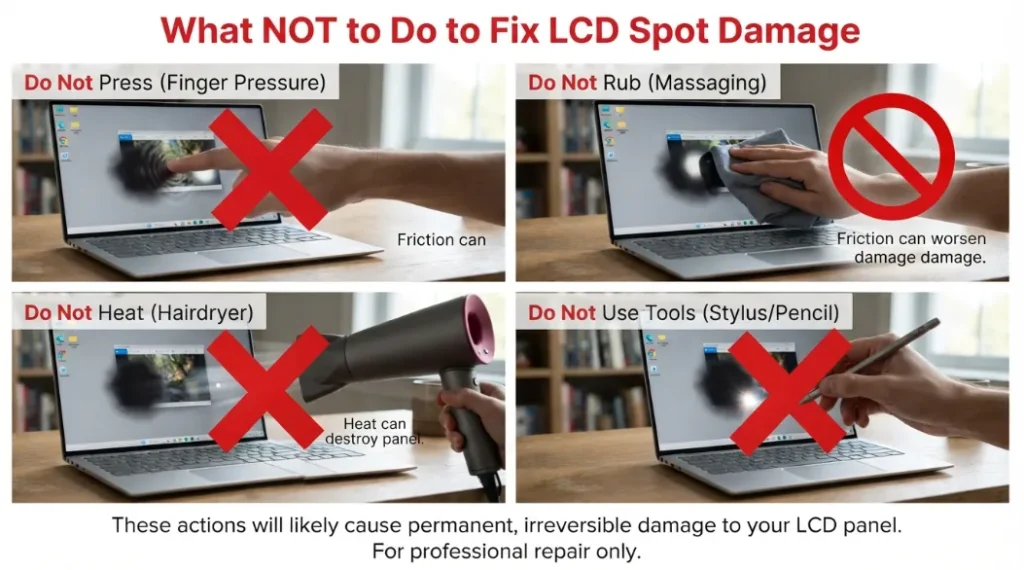
Golden Rule: Never Press, Rub, or Heat the Screen
Before running any tests, resist the urge to push, massage, or apply a stylus/fingertip to the spot. While some online myths claim rubbing fixes stuck pixels, applying mechanical pressure to an LCD panel often crushes liquid crystal cells or damages optical diffusers, turning a minor anomaly into a permanent dark patch. Clean only with a dry microfiber cloth using zero downward force.
Testing helps to determine whether the problem is caused by dirt, an individual pixel, backlight behavior, software rendering, or physical panel damage.
1. Clean the Screen:
Turn the device off and gently wipe the outer surface with a dry microfiber cloth to eliminate fingerprints, dust, and residue. If the mark disappears, it was a surface smudge rather than internal LCD spot damage.
2. Test With a White Screen:
Display a completely white background and look for black spots, dark patches, gray areas, uneven brightness, colored dots, or discoloration. White is useful because dark pixels and many uniformity problems become easier to see.
3. Test With a Black Screen:
Now display a completely black background and look for bright spots, glowing areas, backlight bleed, bright patches, or uneven illumination. If an area becomes much more obvious against black, it may involve the backlight or optical structure rather than a simple dead pixel.
4. Test Red, Green and Blue Screens:
Use solid red, green, and blue backgrounds. This color test helps identify individual pixels and subpixels. A tiny dot that disappears against some colors but remains visible against another may indicate a subpixel problem. A larger patch that remains in the same physical location but changes appearance across colors is more consistent with a panel or optical issue.
5. Change the Screen Brightness:
Move the brightness from low to high and observe the affected area. Ask whether the spot becomes more visible, the brightness changes, the surrounding area becomes uneven, or the spot remains fixed in exactly the same position.
6. Take a Screenshot:
Take a screenshot while the affected area is visible and open it on another device. If the defect does not appear in the screenshot, that strongly suggests the computer is generating the image correctly and the problem is occurring in the physical display path.
7. Check the BIOS or Boot Screen:
Restart the computer and check the display before Windows loads. If the same spot appears on the manufacturer’s logo, BIOS/UEFI screen, or boot menu, Windows software is unlikely to be the cause.
8. Connect an External Monitor:
For a laptop, connect a known-good external monitor or TV if the appropriate video connection is available. If the external display looks normal while the built-in laptop screen has the spot, the internal display assembly becomes the main suspect.
If both displays show the same graphical problem, investigate the graphics system, software, cable, docking hardware, or computer itself. Microsoft and Apple both recommend checking display connections and cables when troubleshooting external monitors.
Use a Screen Test to Check Your Display
A full-screen color test makes small defects immediately apparent by flooding the panel with a single uncompressed color. Cycle through solid white, black, red, green, and blue to isolate the exact nature of the defect.
- Run a live diagnostic now: Use the interactive HowTellMe Screen Test Online tool to cycle test patterns across your display in full-screen mode.
- Viewing tip: Inspect the panel from a normal seating distance first, then step closer only to verify subpixel boundaries. Never press the screen surface while checking color transitions.
Quick Diagnosis Checklist
- If it disappears with a microfiber cloth: Surface dirt, oil, or coating smudge (> Clean gently)
- If it vanishes in a screenshot or external monitor test: GPU driver, OS rendering, or cable issue (> Update drivers or swap HDMI/DP cable).
- If it shows up on the BIOS/boot screen: Hardware or panel failure (> Proceed to physical repair checks)
- If it stays locked in shape and color across RGB screens: Permanent subpixel or internal layer damage (> Evaluate replacement cost)
Can LCD Spot Damage Be Fixed?
Most physical LCD spot damage cannot be repaired with software or household methods. The correct solution depends on what your testing shows.
Problems That May Be Software-Related
Not every screen problem is physical. A rendering problem, graphics driver issue, application bug, or temporary display glitch can create visual artifacts that resemble a screen defect. If the problem appears only inside one application, disappears in screenshots, changes after restarting, does not appear in BIOS or boot screens, or changes with graphics settings, investigate the software and graphics path before replacing the panel.
Dead or Stuck Pixels
A dead pixel generally cannot be restored with software. A stuck pixel may sometimes respond to software-based pixel cycling methods, but results are not guaranteed. Avoid methods that tell you to press or rub the screen. Dell specifically warns against pressure-based DIY pixel repair because it can cause further damage.
Physical LCD Panel Damage
Physical panel damage usually requires screen replacement. Examples include cracked internal layers, significant pressure damage, severe impact damage, liquid crystal damage, major diffuser damage, severe delamination, or extensive internal display defects. The practical repair is usually replacement of the damaged display panel or, depending on the device, the complete display assembly.
Can You Fix LCD Spot Damage at Home?
Most genuine LCD panel damage cannot be fixed with household tools. Do not press, massage, poke with a stylus or fingertip, apply heat (from a hairdryer), or rub aggressively—these actions frequently crack internal liquid crystal layers or strip anti-reflective coatings. Furthermore, do not attempt to disassemble a monitor, laptop, or TV assembly without proper repair experience; doing so often severs fragile ribbon cables or ruins the backlight diffuser.
Can LCD Spot Damage Spread?
It depends on the root cause. A small, stable pixel defect may remain unchanged for years. Physical damage, moisture, cracks, or certain internal failures may become worse.
Usually Stable (More likely to remain localized):
- Isolated dead pixel
- Isolated stuck pixel
- Some manufacturing defects
- Minor panel uniformity issues
May Worsen (Deserve closer monitoring):
- Physical panel damage
- Internal cracks
- Liquid-related damage
- Severe pressure damage
- Heat-related damage
- Delamination
- Damage that already shows signs of expansion
Watch for: The spot becoming larger, new spots appearing, black lines developing, vertical or horizontal lines appearing, discoloration spreading, bright areas becoming larger, or an ink-like pattern expanding. If the display is changing rapidly, avoid applying pressure and arrange professional inspection.
When Should You Repair or Replace the Screen?
The right decision depends on the device, panel availability, repair cost, and overall condition.
Repair May Make Sense When:
- The device is relatively new
- The display panel is available as a replacement part
- The rest of the device works well
- The repair cost is reasonable
- The device has important hardware that would be expensive to replace
- The damage is clearly limited to the display
Screen Replacement May Make Sense When:
- The panel has clear physical damage
- The defect affects normal use
- The repair cost is reasonable relative to the device’s value
- The device is otherwise in good condition
When Should You Replace the Entire Device?
Sometimes replacing the complete device makes more financial sense than repairing the display. Consider replacement when:
- The device is already old
- Several components are failing
- A replacement panel is difficult to find
- The repair cost is very high
- The device has poor battery health or other major problems
- A newer device offers significantly better performance
Compare the actual repair quote with the device’s condition, expected remaining lifespan, replacement cost, and availability of parts. For an older laptop with LCD damage plus battery, keyboard, storage, or motherboard problems, replacing the computer is often more sensible than paying for several repairs.
LCD Spot Damage on Different Devices
Laptop Screens
Laptop displays are particularly exposed to pressure and mechanical stress. Common causes include closing the lid on an object, keyboard debris, pressure inside a backpack, drops, twisting the display, and excessive pressure during cleaning. If a laptop screen develops a spot but an external monitor works normally, the internal display assembly is a strong suspect.
Computer Monitors
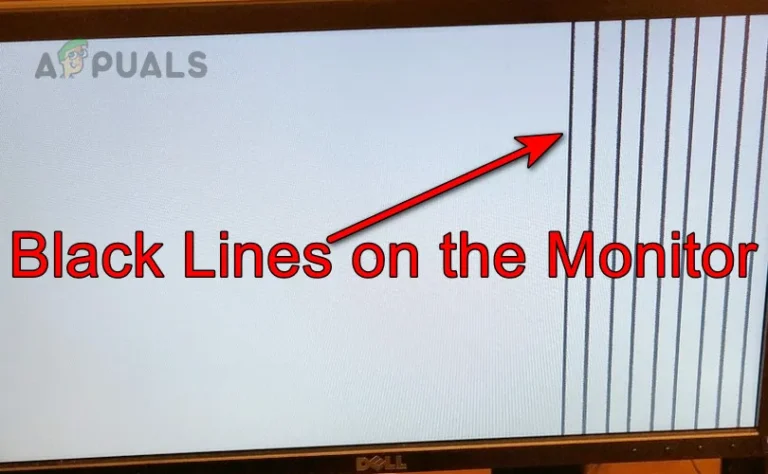
Monitors can develop display damage from impact, pressure, incorrect handling, mounting stress, manufacturing defects, heat, and aging. Be careful when attaching a monitor to an arm or stand; excessive mounting pressure can stress the housing or panel. If you are seeing a persistent line rather than a spot, see our guide on black line on the monitor to troubleshoot the display problem.
TVs
Large TV panels are especially sensitive to impact and localized pressure. A TV may develop dark patches, bright areas, lines, or cracks after being struck or moved incorrectly. Never lift a large display by pressing directly against the panel.
Phones and Tablets
Smartphones and tablets can develop spots after drops, bending, pressure in a pocket or bag, impact, moisture exposure, or damage beneath cracked glass. A phone’s outer glass can remain mostly intact while the internal display suffers damage. This is why a cracked screen should not automatically be treated as only a cosmetic issue.
How to Prevent LCD Spot Damage
- Handle the Screen Gently: Hold a laptop or monitor by its frame rather than pressing the display surface. Avoid pushing against the panel when moving or cleaning it.
- Keep Objects Away From Laptop Displays: Never place heavy objects directly on a laptop. Avoid putting books, chargers, pens, or other items on the closed device.
- Check the Keyboard Before Closing a Laptop: Look across the keyboard before closing the lid to ensure no small object or debris is trapped.
- Use a Protective Case or Sleeve: A suitable sleeve reduces the risk of impact during transport for laptops, phones, and tablets.
- Avoid Excessive Heat: Keep the device away from extreme heat and prolonged focused sunlight to prevent thermal stress.
- Keep Liquids Away: Do not place drinks next to electronics; liquid damage affects both the display and its internal controller electronics.
- Clean the Screen Correctly: Use a soft microfiber cloth following the manufacturer’s cleaning recommendations. Do not spray liquid directly onto the display.
- Transport Displays Carefully: Protect panels from bending, vibration, impact, and pressure during transit.
- Avoid Excessive Mounting Pressure: Follow manufacturer mounting instructions carefully for monitors, commercial displays, kiosks, and automotive screens.
Frequently Asked Questions About LCD Spot Damage
Here are some Frequently Asked Questions About LCD Spot Damage
Final Verdict
The best way to deal with LCD spot damage is to identify the type of defect before trying to fix anything. Start by cleaning the surface gently, then test the display with white, black, and RGB backgrounds. Use a screenshot and boot-screen test to separate software problems from physical display damage.
Do not apply mechanical force or heat to the panel. If testing confirms physical LCD panel damage, screen replacement is the most reliable solution. Your final repair decision should weigh the device’s age, panel availability, repair cost, and overall condition.

3 Comments